If you’re a woodworking enthusiast or a DIY aficionado, you’ve probably heard the buzz about linseed oil and its potential benefits for treating and preserving wood. But does this wonder oil work its magic on all types of wood?
Specifically, is linseed oil good for cedar?
We’re here to shed some light on this topic and give you the lowdown on why linseed oil and cedar might just be a match made in woodworking heaven.
let’s lay out a quick pros and cons table for using linseed oil on cedar wood:
| Pros | Cons |
|---|---|
| Natural Preservation: Acts as a barrier against moisture, mold, and mildew. | Drying Time: Linseed oil can take some time to fully dry and cure, requiring patience during the application process. |
| Restores Vibrancy: Revives and intensifies cedar’s natural colors and sheen. | Reapplication Needed: While linseed oil provides long-lasting results, periodic reapplication is necessary to maintain its benefits. |
| Prevents Cracking: Helps keep cedar wood fibers flexible and minimizes the risk of cracking. | Color Darkening: Over time, linseed oil can slightly darken the wood’s color, which might not be desired in certain projects. |
| Easy Application: Simple to apply with a cloth or brush, making it accessible for DIYers. | Odor During Drying: Linseed oil can emit a noticeable odor during the drying process, which might be a concern for indoor applications. |
| Environmental Friendliness: A natural product without harmful chemicals, making it eco-friendly. | Flammable: Linseed oil is flammable, so proper storage and handling precautions are essential. |
| Versatility: Can be used as-is or mixed with pigments for a customized finish. | Cost: While not prohibitively expensive, high-quality linseed oil can be pricier compared to some commercial wood finishes. |
| Long-Lasting Results: Offers enduring protection and enhancement to cedar wood. | Curing Time: Linseed oil fully cures over several weeks, so patience is required before subjecting the wood to heavy use. |
Understanding Cedar’s Natural Beauty
Cedar wood is renowned for its exceptional durability and natural resistance to decay. It’s a favorite choice for outdoor projects like decks, fences, and garden furniture.
However, like all wood, cedar is not impervious to the elements.
Over time, it can lose some of its luster due to exposure to sunlight, moisture, and general wear and tear.
The Linseed Oil Connection
Linseed oil, derived from flax seeds, has been a popular wood treatment for centuries.
Its deep-penetrating properties make it an excellent choice for enhancing the longevity and aesthetics of various wood types.
But what about cedar?
Let’s delve into the five compelling reasons why linseed oil can work wonders on cedar wood:
Why Linseed Oil is good for Cedar
1. Natural Preservation
Cedar’s innate resistance to insects and decay might make you think it doesn’t need any extra help. However, applying linseed oil can provide an additional layer of protection.
The oil seeps into the wood, acting as a barrier against moisture and preventing the growth of mold and mildew.
This is especially crucial for cedar items exposed to the ever-changing weather.
2. Restoring Vibrancy
As cedar ages, its once-rich colors can fade due to sun exposure.
Here’s where linseed oil comes to the rescue.
Applying linseed oil can bring back that warm, vibrant hue that cedar is loved for.
The oil intensifies the wood’s natural shades while leaving a gorgeous, subtle sheen.
3. Flexibility and Cracking Prevention
Cedar wood is known for its dimensional stability, meaning it’s less likely to warp or shrink. But it’s not entirely immune to cracking.
Linseed oil’s penetrating nature can help prevent cracking by keeping the wood fibers nourished and flexible.
This is especially vital in dry climates where cedar might lose moisture rapidly.
4. Easy Application, Stunning Results
Applying linseed oil might sound like a daunting task, but it’s actually quite simple. You can choose between raw and boiled linseed oil.
The latter is often preferred for woodworking projects due to its faster drying time.
Applying the oil with a cloth or brush and then wiping off the excess is all it takes.
The result?
A cedar surface that looks professionally finished.
5. Environmental Friendliness
If you’re someone who values eco-friendliness, linseed oil won’t disappoint.
It’s a natural product, free from harmful chemicals typically found in many commercial wood finishes.
This means you can treat your cedar items without worrying about toxic fumes or negative impacts on the environment.
6. Enhanced Water Resistance
Cedar is naturally water-resistant, but prolonged exposure to moisture can still lead to deterioration over time.
Linseed oil forms a protective barrier that repels water, helping to prevent swelling, warping, and cracking that can occur when cedar absorbs excess moisture.
This is particularly valuable for outdoor cedar structures, such as fences and pergolas, that are constantly battling the elements.
7. Slow and Steady Aging
Cedar’s charm lies in its ability to gracefully age, taking on a distinguished silver-gray patina.
Linseed oil can help slow down this aging process, allowing cedar to retain its original color for longer.
This is ideal for those who appreciate the youthful glow of cedar but still want to savor the graceful transformation over the years.
8. Versatility and Customization
Linseed oil offers a versatile platform for customization.
If you prefer a more natural finish, you can opt for linseed oil on its own.
For a different look, you can mix linseed oil with natural pigments or dyes to create a stain that matches your aesthetic preferences.
This versatility empowers you to tailor the treatment to suit your project’s specific style.
9. Boosting Cedar’s Natural Aroma
Cedar is known for its distinctive aroma, which comes from natural compounds within the wood.
Applying linseed oil can intensify this fragrance, adding an inviting and rustic scent to your cedar items.
This aromatic bonus can be particularly appealing when using cedar for indoor furniture or decorative pieces.
10. Long-Lasting Results
One of the hallmarks of linseed oil is its ability to provide long-lasting results.
Unlike some commercial finishes that may require frequent reapplication, a well-applied coat of linseed oil can endure for an extended period.
This means less maintenance over time, allowing you to enjoy your beautifully treated cedar creations without constant upkeep.
11. A Holistic Approach to Wood Care
Linseed oil isn’t just a superficial treatment – it works its magic from within the wood fibers.
By nourishing and protecting the wood at a structural level, linseed oil ensures that your cedar projects remain strong and durable.
This holistic approach to wood care means that you’re investing in the longevity of your creations.
12. Time-Tested Tradition
For centuries, craftsmen have turned to linseed oil to enhance the beauty and longevity of wood.
This time-tested tradition speaks volumes about the effectiveness of this treatment.
The fact that linseed oil has stood the test of time in the woodworking world is a testament to its reliability and impressive results.
How to Apply Linseed Oil to Cedar Wood:
Materials You’ll Need:
- Linseed oil (raw or boiled)
- Clean, lint-free cloths or brushes
- Sandpaper (if needed)
- Protective gloves
- Well-ventilated workspace
- Drop cloths or newspaper to protect the surroundings
- Small container for the linseed oil
Steps:
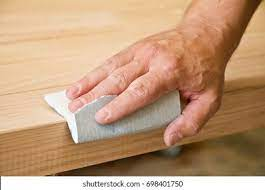
- Prep the Surface:
- Start by ensuring that the cedar wood surface is clean and free from any dust, dirt, or previous finishes. Sand the wood gently if needed to create a smooth and even surface. Wipe away the sanding residue with a clean cloth.
- Choose the Right Linseed Oil:
- Decide between raw and boiled linseed oil. Boiled linseed oil is often preferred for woodworking due to its faster drying time. If you choose raw linseed oil, keep in mind that it takes longer to dry and cure.
- Protect Yourself and Your Workspace:
- Linseed oil can be messy and may emit fumes during the drying process. Wear protective gloves and work in a well-ventilated area. Use drop cloths or newspaper to protect your work surface from spills.
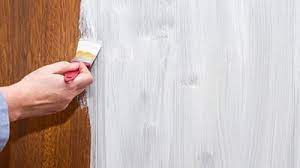
- Apply the Linseed Oil:
- Pour a small amount of linseed oil into a container. Dip a clean cloth or brush into the oil, ensuring it’s soaked but not dripping.
- Apply a thin, even coat of linseed oil to the cedar wood surface. Work in the direction of the wood grain for the best results.
- Let it Penetrate:
- Allow the linseed oil to penetrate the wood for about 15-20 minutes. This helps the oil seep into the wood fibers for effective protection.
- Wipe Off Excess:
- After the penetration time, use a clean cloth to gently wipe off any excess linseed oil. This step is crucial to prevent a sticky or tacky finish.
- Let it Dry:
- Allow the cedar wood to dry for the recommended time. Boiled linseed oil generally dries faster than raw linseed oil. Be patient and avoid subjecting the wood to heavy use during this period.
- Repeat (if Desired):
- Depending on the level of protection and finish you’re aiming for, you can repeat the application process, allowing sufficient drying time between coats.
Tips for a Successful Application:
- Start Small: If you’re new to using linseed oil, practice on a small, inconspicuous area before applying it to your entire project.
- Thin Coats: Apply thin coats of linseed oil to avoid over-saturation and a tacky finish. Multiple thin coats are better than one heavy coat.
- Wipe Off Excess: Always wipe off excess oil after allowing it to penetrate. Leaving excess oil on the surface can result in a sticky, unattractive finish.
- Ventilation: Work in a well-ventilated area or outdoors to minimize exposure to fumes.
- Safety Precautions: Linseed oil is flammable, so store soaked rags in a well-sealed metal container to prevent spontaneous combustion.
- Patience Pays Off: Allow the oil to dry and cure fully before using the wood. This can take several weeks but results in a durable finish.
- Maintenance: Periodically reapply linseed oil to maintain the protection and appearance of the wood.